
How to Choose the Best Solar Charger Controller
Key Takeaways
- Identify the appropriate charge controller type: PWM vs. MPPT.
- Consider compatibility with your battery type: lead-acid, gel, or lithium.
- Look for essential features like multiple protection functions and a clear LCD display.
- Ensure the solar charger controller is easy to install and operates efficiently.
- Check the voltage compatibility for your solar power system.
Choosing the right solar charger controller is critical for optimizing energy efficiency and protecting your battery in your RV solar setup. This article will guide you through the key considerations when selecting a solar charger controller, ensuring you make an informed decision that suits your needs.
Understanding Solar Charger Controllers
Solar charger controllers act as the brain of your solar power system. They regulate the voltage and current coming from the solar panels while ensuring that batteries are charged efficiently and safely. There are several factors to consider when selecting one for your RV solar system.
Types of Solar Charger Controllers
| Type | Description | Pros | Cons |
|---|---|---|---|
| PWM (Pulse Width Modulation) | Offers simple regulation of charging by transitioning the voltage on and off. |
|
|
| MPPT (Maximum Power Point Tracking) | Maximizes energy harvesting by adjusting the electrical operating point of the modules. |
|
|
Key Considerations When Choosing a Solar Charger Controller
1. Battery Type Compatibility
Ensure that the solar charger controller you choose is compatible with your battery type, whether it’s lead-acid, gel, or lithium. For example, the ECO-WORTHY 30A Solar Charger Controller is suitable for various battery types, making it versatile for your needs.
 Top Choice
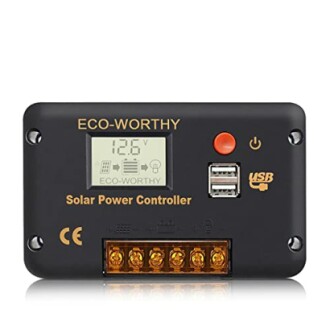
ECO-WORTHY 30A Solar Charger Controller
An intelligent solar panel battery regulator featuring dual USB ports and multiple protection functions, designed for easy installation.
Learn More2. Voltage Compatibility
Make sure your solar charger controller can handle the voltage of your solar panels and battery systems (12V or 24V). Check the specifications of both to ensure compatibility.
3. Protection Features
Look for controllers with built-in protections such as:
- Short-circuit protection
- Over-charging and over-discharging protection
- Reverse polarity protection
4. Display Options
A clear LCD display is essential for monitoring power levels and charging status. It allows for easy configuration and monitoring.
Installation Tips for Solar Charger Controllers
Proper installation is crucial to ensure your solar charger controller works efficiently. Here are some tips:
- Connect the Battery First: Ensure the battery is connected before adding other components.
- Follow the Wiring Order: Connect the solar panel next, followed by the load.
- Ventilation is Key: Install the controller in a well-ventilated area for optimal performance.
- Test the System: After installation, check the system to ensure everything is functioning properly.
Tips for Beginners
- Always consult the user manual for specific installation guidelines.
- Keep cables neat and tidy to avoid accidental disconnects.
- Use only components that are compatible with your solar system.
Final Thoughts
Selecting the right solar charger controller is essential for the success of your RV solar power system. Consider compatibility, efficiency, and installability before making a purchase. This will ensure that you maximize energy generation while protecting your batteries for long-lasting performance.
Pros
- Enhances the lifespan of your battery.
- Maximizes solar system efficiency.
- Available in various types for different setups.
Cons
- May require a higher upfront cost for MPPT controllers.
- Incorrect installation can lead to system failures.
Explore More Resources
For additional insights on RV solar systems, check out our guide on choosing the right RV solar kit, or explore our complete solar systems section for comprehensive setups. Don’t forget to look into our essential accessories that can further enhance your installation.